What is CloudFlare and why do we use it?
CloudFlare is an American company which provides DDoS protection and access to it’s own Content Delivery Network (CDN). In order to make our website as accessible and fast as possible, we often turn to CDNs. A CDN is a network of servers that stores parts of your data in multiple geo-locations and thus depending on your current location serves you the closest ones. It is also worth mentioning that CloudFlare provides you with a free SSL certificate.
Let’s start…
In order to configure our CloudFlare protection, we have to open a free account on www.cloudflare.com.
After we have created an account we have to sign in into the CloudFlare Dashboard. From Dashboard, we are able to select “Websites” in the left menu and then select the “Add Site” button in center of our screen.
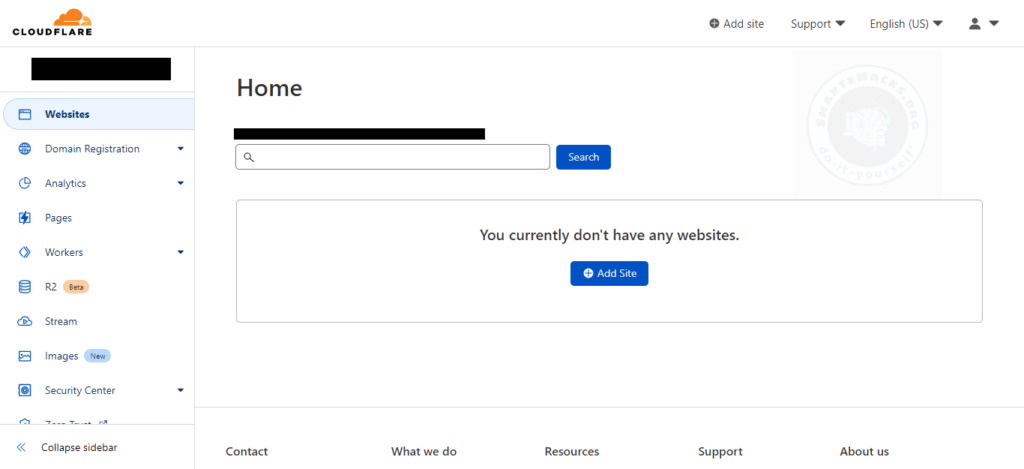
After selecting “Add Site” button, the process continues and we get an interface that looks like this:
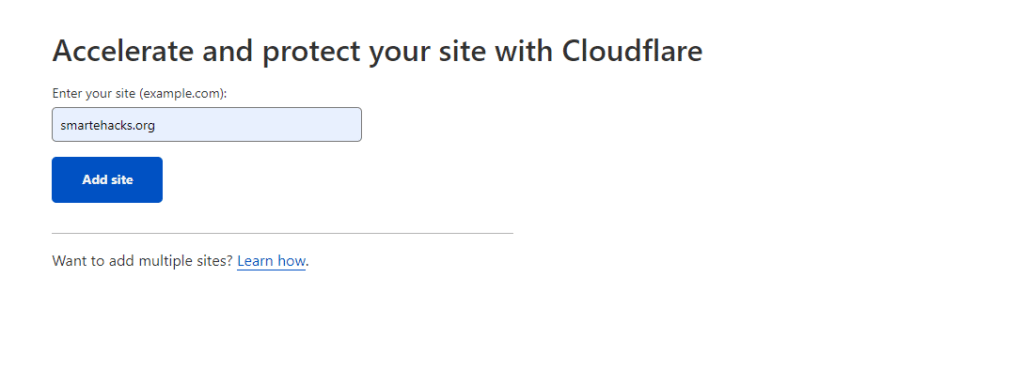
We have to input our domain’s name, smartehacks.org in our case, and click “Add site” button in order to continue. The next step is to select a plan we want to use with our domain. There are multiple choices, but for this tutorial, we will select the “Free” plan.
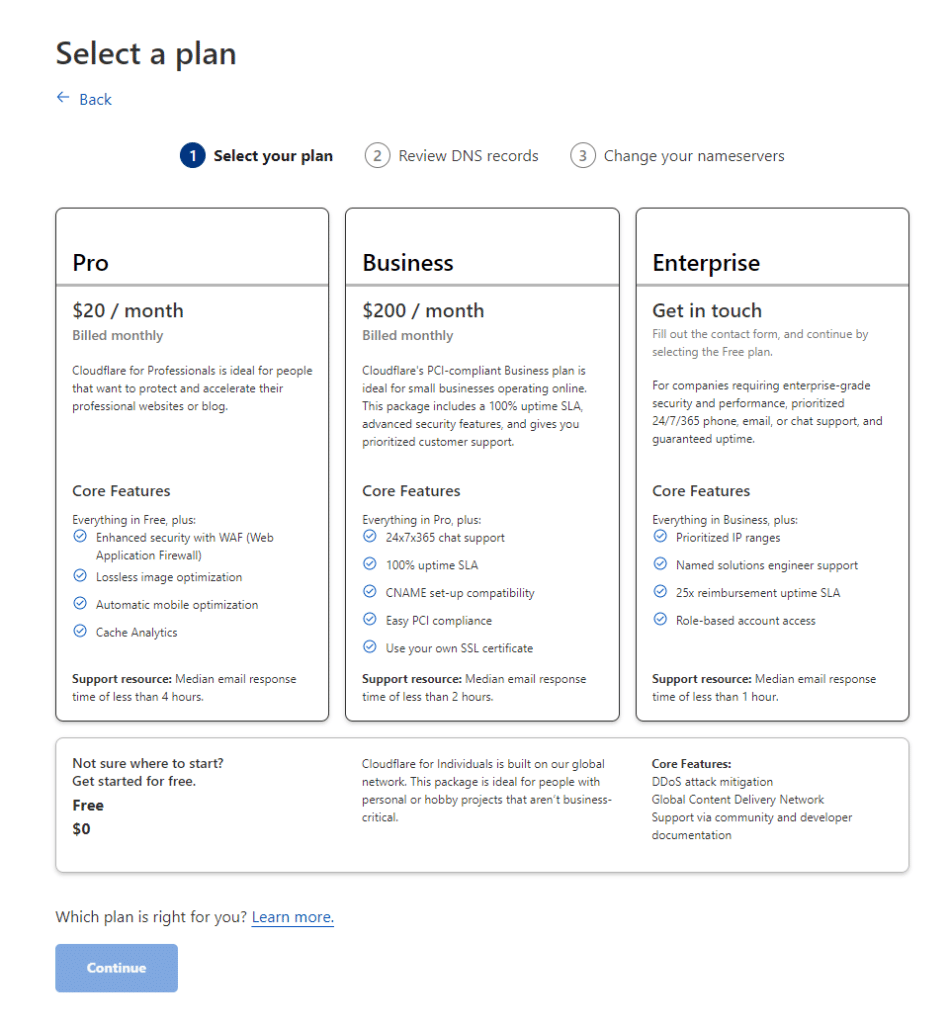
By selecting the desired plan “Continue” button becomes available and it allows us to go to the next step.

In the next step CloudFlare tries to find existing DNS records for your domain and copy them into it’s own DNS zone. After finding the existing records, it allows us to review them so we are able to add the ones that are missing before it creates the DNS zone.
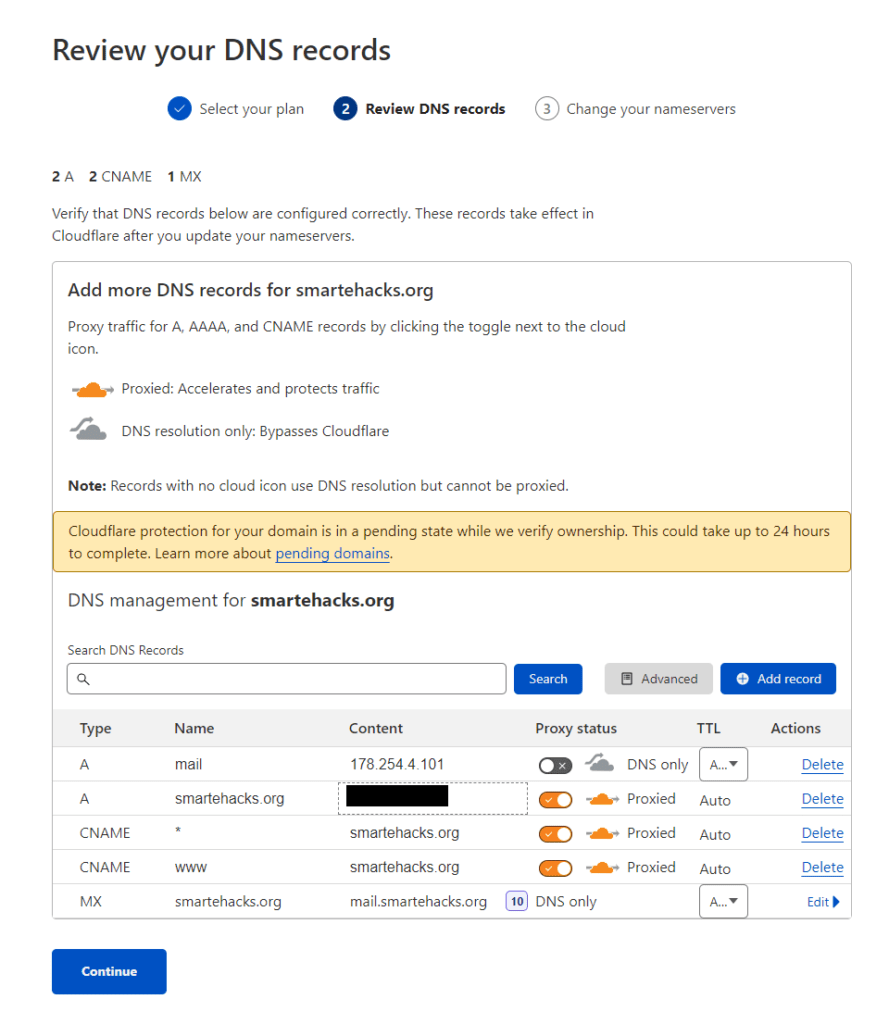
We had to manually add 2 CNAME records. CNAME which points www.smartehacks.org to smartehacks.org and *.smartehacks.org which points to smartehacks.org. This article assumes you have a basic knowledge about DNS and roles of the DNS records. In the next step
, we have to update our NameServers (NS records).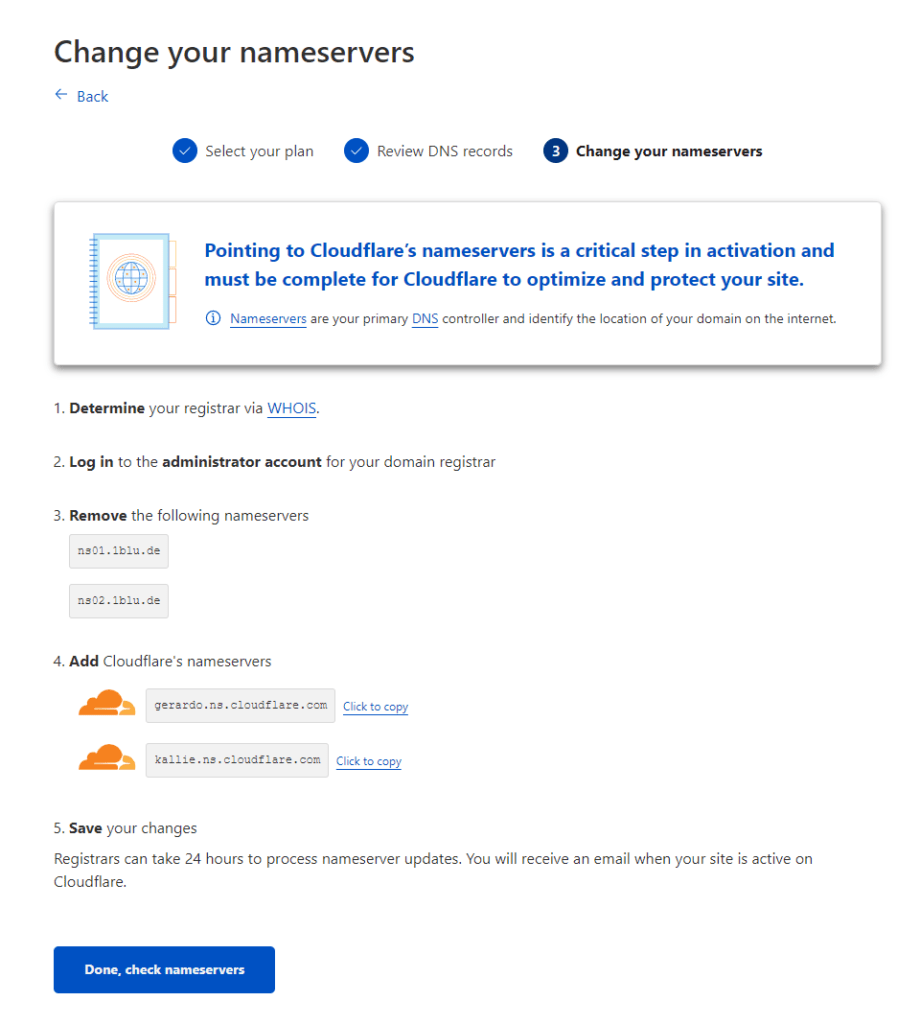
CloudFlare checks for our authoritative NameServers and tells us which values should be updated. For our domain we have to update ns01.1blu.de and ns02.1blu.de to gerardo.ns.cloudflare.com and kallie.ns.cloudflare.com. (Values which you get from the CloudFlare can be different.)
Depending on your hosting company, updating the NameServers can differ, but all of them are using some kind of “DNS zone manager” or “DNS manager” for managing the actual DNS zone. Some of the most popular hosting companies are: Hostinger, Bluehost ,GoDaddy, Nexcess, Namecheap. There are a lot of hosting companies and choosing the right one for yourself is really just a preference.
Our choice is 1blu.de – German hosting company which has pretty cheap server and domain prices. Again, choosing the right hosting company really depends on your preference. Changing NameServers at 1blu.de goes like this:
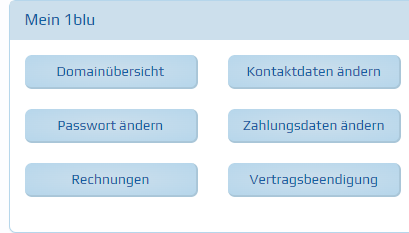
Even though prices are affordable, their interface is in German language (P.S. Thank God on Google translate)
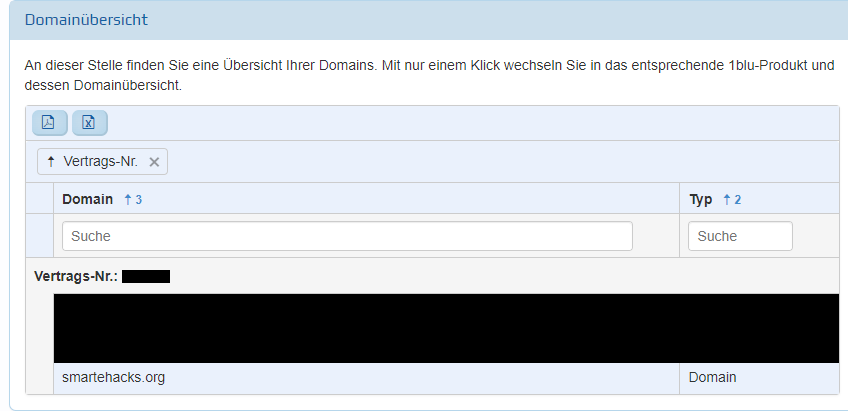
“Domainubersicht” gives us a preview of our domain, where we select “smartehacks.org”. We have to open our DNS zone and add our custom Nameservers, or in German: “Eigene Nameserver”.
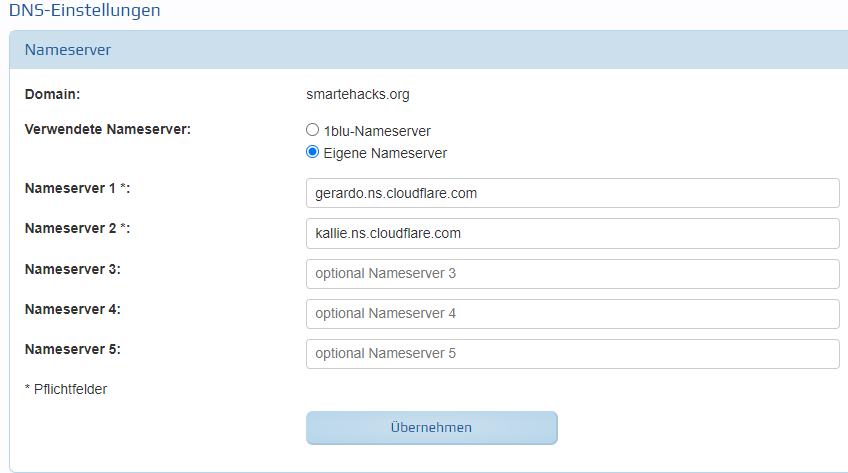
After updating our Nameservers, we have to allow some time for DNS propagation period. That is the time frame it takes for DNS changes to be updated across the Internet. In order to monitor progress of our propagation we can use online tools like whatsmydns.net or dnschecker.org.
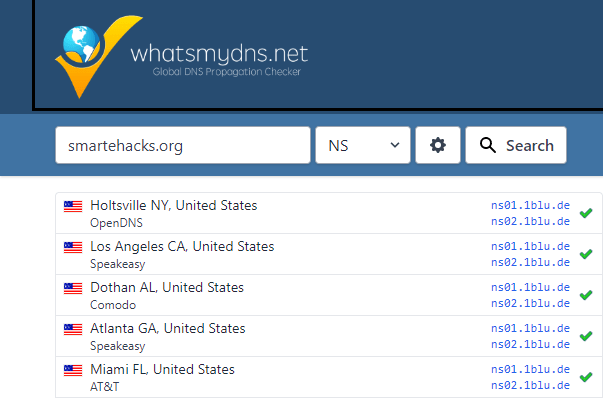
After updating our NS records, we can see that our domain is still pointing to ns01.1blu.de and ns02.1blu.de, trying the same using dnschecker:
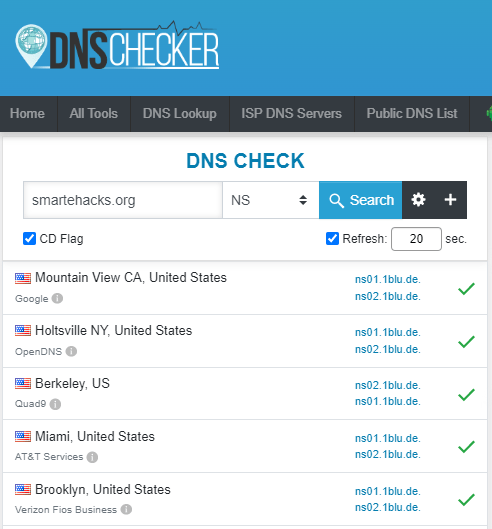
We got the same result
, let’s wait for a few more minutes and then try again: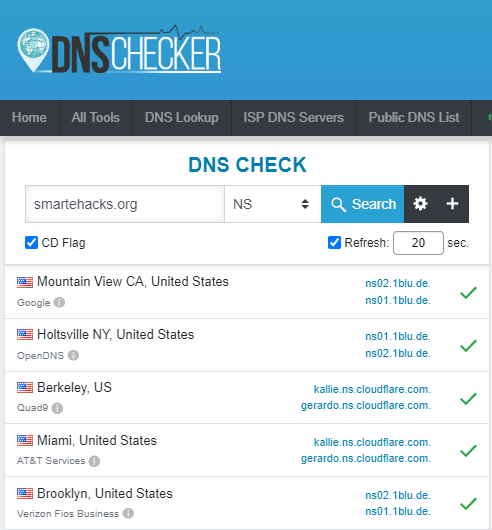
NameServers are now pointing to CloudFlare, we are able to confirm that propagation has already started – however it is important to mention that DNS propagation can take up to 72 hours.
We have now successfully configured our CDN and DDoS protection, congratulations!


 At SmarteHacks.org, we use cookies to analyze website usage, improve user experience, and offer you content, products, and services that best match your interests. If you click on “I accept all”, then all cookies are used. You can, of course, change the "Cookie settings" and determine which cookies you want to accept.
 Na portalu SmarteHacks.org koristimo kolačiće kako bismo analizirali korištenje web stranice, unaprijedili korisničko iskustvo te vam ponudili sadržaj, proizvode i usluge koji najbolje odgovaraju vašim interesima. Ako kliknete na "I accept all", tada se koriste svi kolačići. Možete naravno da promijenite postavke kolačića sa "Cookie settings" te sami odredite koje kolačiće želite prihvatiti.